Modbus SCADAPack Configuration
- Michael Standal
- Emma Fullilove (Deactivated)
- Alex Mouton
Device Tab
See the Common Modbus Device Tab page.
SCADAPack Tab
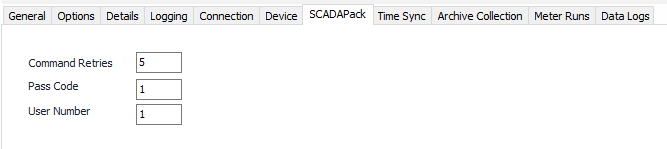
Command Retries
Default = 5. The maximum number of retries to use when sending a command message during history retrieval.
Pass Code
Default = 1. Pass code field for security.
User Number
Default = 1. User number field for security.
Time Sync Tab
See the Common Time Sync Tab page.
Archive Collection Tab
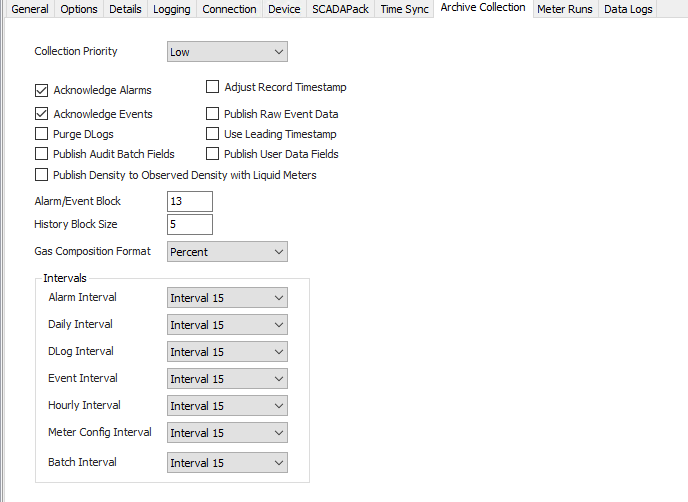
Collection Priority
- Low (Default).Queues up with other Low priority items.
- Medium. Interrupts Low priority items, and queues up with other Medium priority items.
- High. Interrupts Medium and Low priority items, and queues up with other High priority items.
Collection Options
- Acknowledge Alarms: Default = Selected. Acknowledge alarms after retrieval and storage. Note, if this option is not selected, the same alarms may be retrieved more than once.
- Acknowledge Events: Default = Selected. Acknowledge events after retrieval and storage. Note, if this option is not selected, the same events may be retrieved more than once.
- Purge DLogs :Default = Not selected. Select to purge records from the data log after retrieval and storage.
- Publish Audit Batch Fields: Default = Not selected. Select to publish batch related fields contained in audit records. Note, valid only for devices that support batch.
- Publish Density to Observed Density with Liquid Meters: Default = Not Selected. When selected, the Density value will be published to Observed Density for Liquid Meters.
- Adjust Record Timestamp: Default = Not selected. Select to round up hourly and daily ending timestamps if they are within one second of the hour.
- Publish Raw Event Data: Default = Not selected. Select to publish raw event bytes as a field in the event record.
- Use Leading Timestamp: Default = Not selected. Select to use a leading timestamp in the EFM Record (this setting only applies to 32 Bit Controllers with Flow Computer versions 6.70 and higher).
- Publish User Data Fields: Default = Not selected. Select to publish user data fields in audit and batch records for liquid and water runs.
Alarm/Event Block
Default = 13. The number of alarm or event records to retrieve in a single request (this setting only applies to devices with Flow Computer version 5.20 or higher).
History Block Size
Default = 5. The number of hourly or daily records to retrieve in a single request (this setting only applies to devices with Flow Computer version 5.20 or higher).
Gas Composition Format
Default = Percent. Select the desired option to publish gas component data in percent or mole fraction values.
Collection Intervals
Select the desired Interval relating to the Schedule object assigned on the Connection tab. Record collection will occur at a frequency based on the configuration of this interval.
Meter Runs Tab
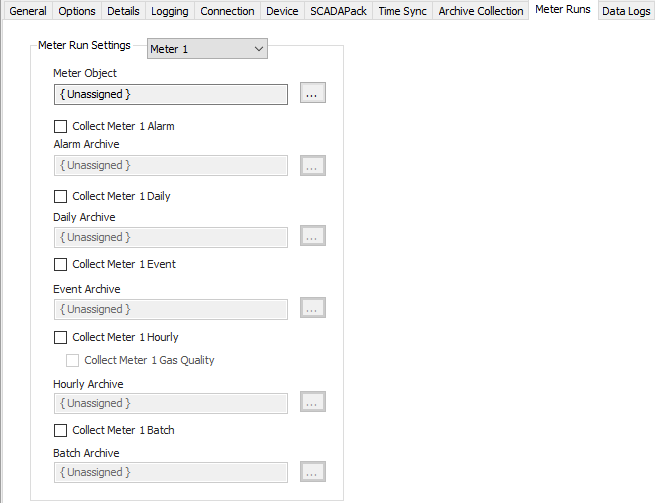
Meter 1-20
Select the Meter number to edit.
Meter Object
Click  to select or create the Meter Object assigned for the meter run. See the Meter section for more details.
Collect Meter 1 Alarm
Default = Not selected. Select to configure and collect alarms for the selected meter run.
Alarm Archive
Click to select or create an Archive Limits. See the Archive Limits section for more details.
Collect Meter 1 Daily
Default = Not selected. Select to configure and collect daily records for the selected meter run.
Daily Archive
Click to select or create an Archive Limits. See the Archive Limits section for more details.
Collect Meter 1 Event
Default = Not selected. Select to configure and collect event records for the selected meter run.
Event Archive
Click to select or create an Archive Limits. See the Archive Limits section for more details.
Collect Meter 1 Hourly
Default = Not selected. Select to configure and collect hourly records for the selected meter run.
Collect Meter 1 Gas Quality
Default = Not selected. Select to collect historical gas quality records for the selected meter run. Gas quality record data will be combined with the hourly flow record for the same time period.
This option is only valid for gas runs and 32 bit controllers running Flow Computer version 6.77 and higher.
Collect Meter 1 Batch
Default = Not selected. Select to configure and collect batch records for the selected meter run.
Batch Archive
Click to select or create an Archive Limits. See the Archive Limits section for more details.
Data Logs Tab
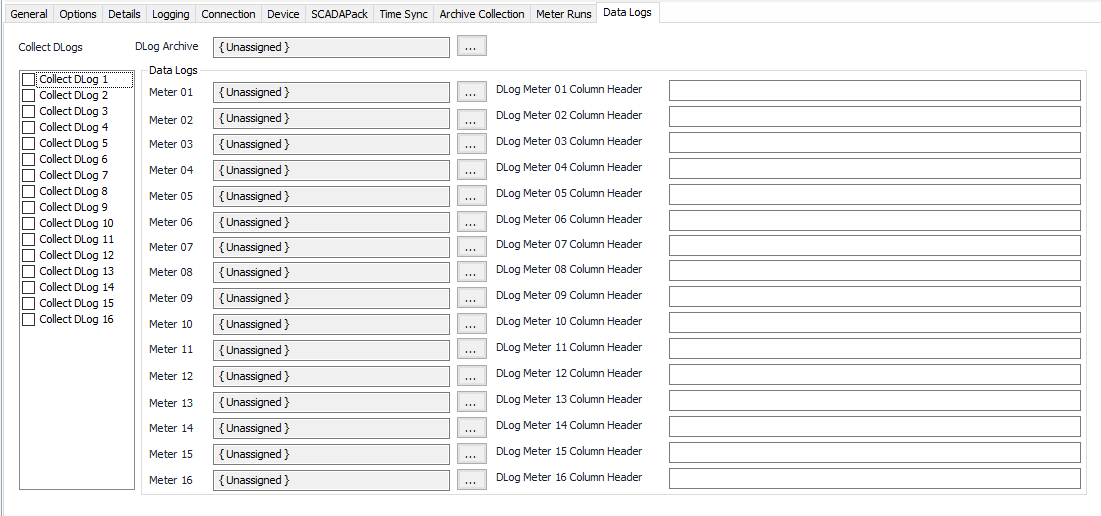
Collect DLogs 1-16
Default = Not selected. Select to collect DLog.
DLog Archive
Click to select or create an Archive Limits. See the Archive Limits section for more details.
DLog Meter 1-16
Click to select or create the Meter Object assigned for the meter run. See the Meter section for more details.
DLog Meter 1-16 Column Header
This is the comma separated list for the DLog user-defined column header. If nothing is entered in the field, "FieldX" will be used for all column headers. If an individual column is left empty (e.g. no space between commas: Volume,,Pressure,) "FieldX" will be used for that specific column header so that it will display Volume, Field2, Pressure, Field4. *The X in FieldX will be numbered according to column position.
Related content
For assistance, please submit a ticket via our Support Portal, email autosol.support@autosoln.com or call 281.286.6017 to speak to a support team member.