| Expand | ||||
|---|---|---|---|---|
| ||||
|
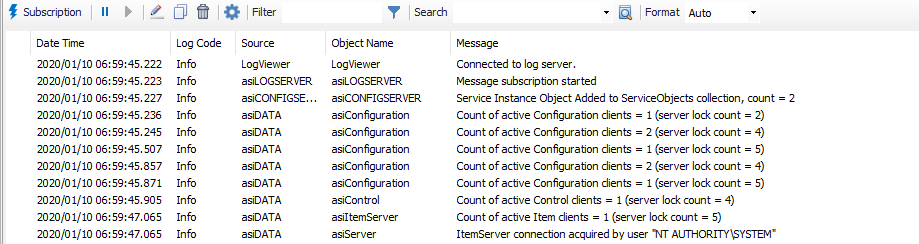
Overview
The log viewer tab contains an instance of the Log Viewer control and by default is subscribed to all events and objects.The Log Viewer guide will go into detail on its usageLog Viewer is a logging utility that captures messages, or trace log information for file storage and/or viewing. Log Viewer is useful for diagnosing problems and verifying communications to devices and other software. The log messages sent to Log Viewer depend on the configuration of ACM. Within the protocol and connection configuration modules are options for logging. When these options are selected, the appropriate messages will be sent to the Log Viewer.
| Info | ||
|---|---|---|
| ||
Reference the General Logging for more information about logging. |
Log Viewer Interface
Subscription
When the "Subscription" ( ) button is clicked, the Subscribe to Log Messages windows displays all device and port objects. The list is grouped by the assigned port in the device object.

Subscribe to Log Messages
All Log Messages. (Default) Displays all logged data
- Select Log Messages. Allows for user to select which data appears from the selected objects on the left.
- Check System Messages to include ACM system messages in the log.
Play/Pause
Click either  to pause or
  to resume live logging when appropriate.
| Info | ||
|---|---|---|
| ||
|
Append Mark
Clicking the Append Mark button ( ) will insert a marked line in the logger as configured in Settings.
Copy
Clicking the copy button ( ) will copy all logged data up to the configured History Buffer Size.
Clear
Clicking the clear button ( ) removes all data from the history buffer.
Settings
Clicking the settings button ( ) will bring up the window below:
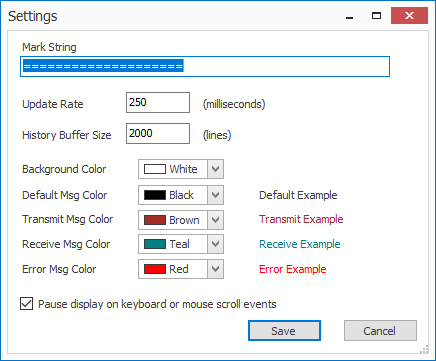
The Settings window
- Mark String - This field will mark the time between two different logging events to visually separate them.
- Update Rate - 250 milliseconds (Default)
- History Buffer Size - 2000 lines (Default)
- Colors - Set the desired color to apply to the different log line types.
- Pause display on keyboard or mouse scroll events - Enabled by default.
Search

Use this field to search the log for a specific term.
Filter

Enter the parameters by which to filter the log here. If enabled ( ), the filter is applied to both real-time and stored log data up to the configured History Buffer Size.
| Info | ||
|---|---|---|
| ||
Filter will apply only to subscribed objects. |
Format
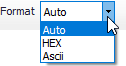
- Auto (Default) − Displays the communication bytes, as specified by the protocol.
- HEX − Hex format displays the raw communication log data in hexadecimal format.
- ASCII − ASCII format displays the raw communication log data in ASCII format.
Mouse Menu Commands
Additionally, right-click the logger to see the following available options:
- Copy All Rows
- Copy Selected Rows (Ctrl+C)
- Create Email with All Rows
- Create Email with Selected Rows
- Clear All (Crtl+Shift+X)
- Append Mark (Ctrl+M) Adds the defined Mark String into the log
- Toggle Bookmark (Crtl+B)
- Next Bookmark (Ctrl+Down)
- Prev Bookmark (Ctrl+Up)
- Filter On This Object
- Open Object (Ctrl+O) Open the properties of the object in the Configuration tab.
- Settings… Open the log Settings window.