| Expand | ||||
|---|---|---|---|---|
| ||||
|
...
Time Synchronization Configuration
Click  to select or create the Connection Object assigned to this device. See the Time Synchronization section for more details.
Time Synchronization Interval
Select the desired Time Synchronization Interval relating to the Schedule object assigned on the Connection tab. Time Synchronization checks occur on the frequency of this interval.
Time Synchronization Priority
- Low. Queues up with other Low priority items.
- Medium (Default). Interrupts Low priority items, and queues up with other Medium priority items.
- High. Interrupts Medium and Low priority items, and queues up with other High priority items.
Timezone
Default = UTC-06:00 Central Time (US & Canada).
Archive Collection Tab
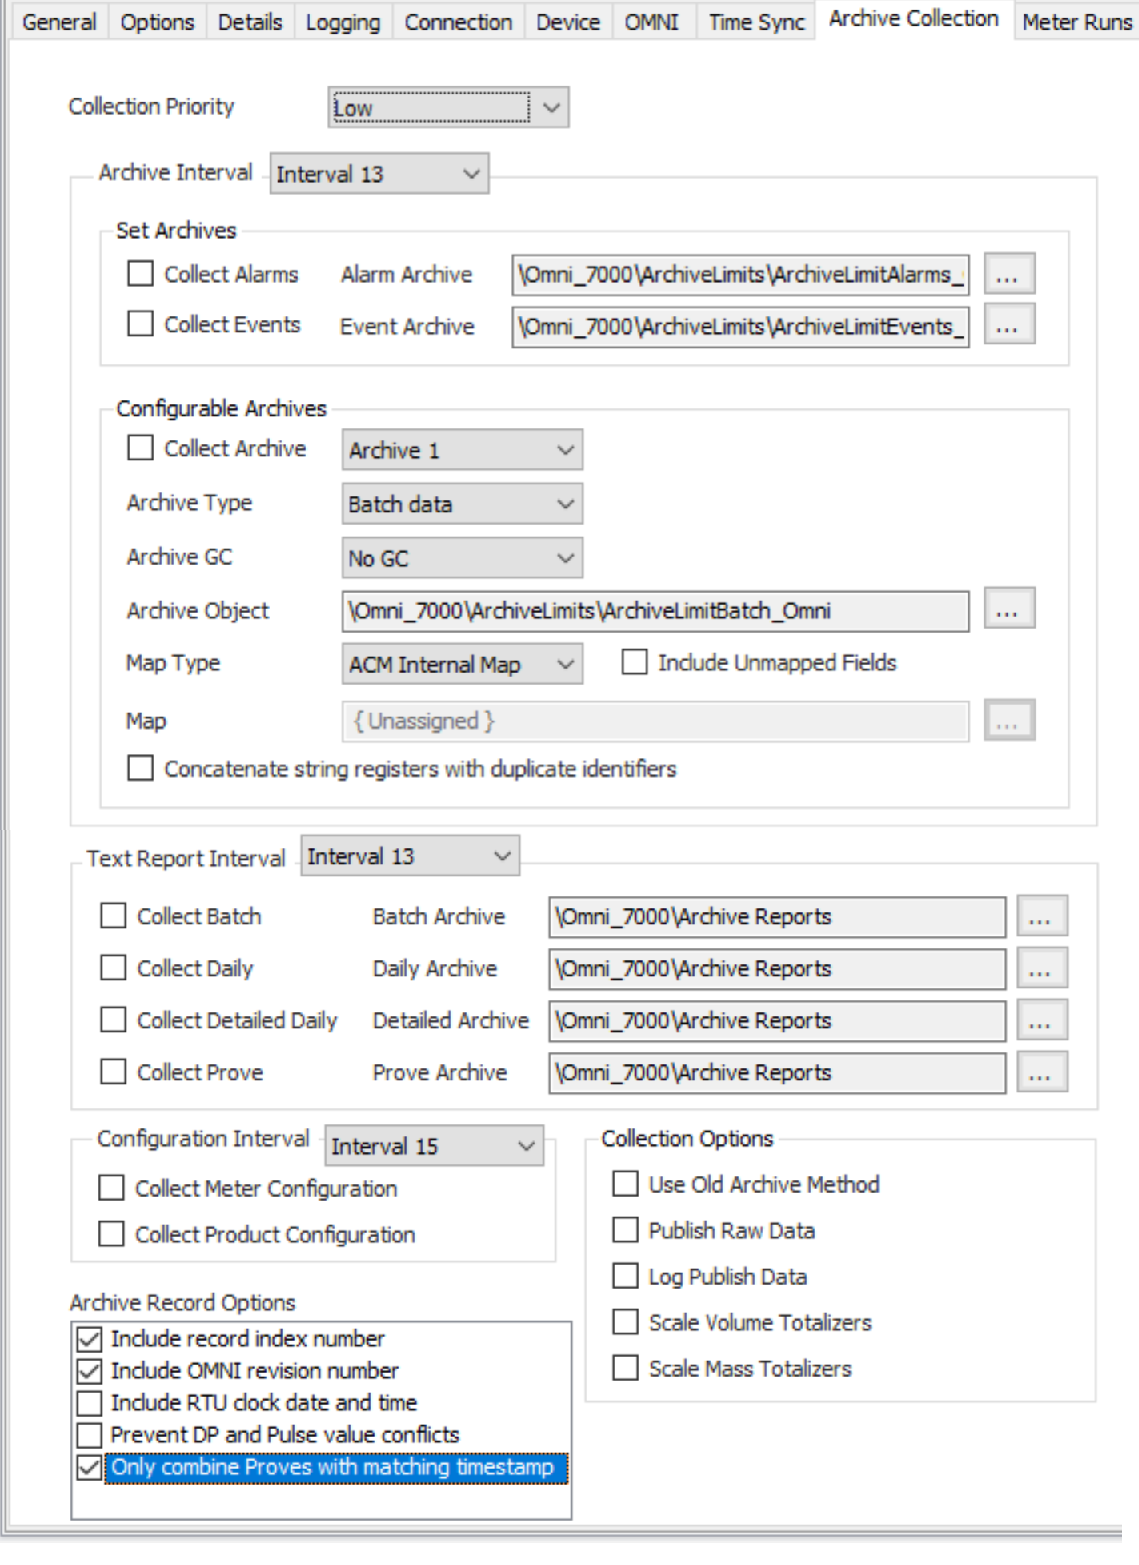
Collection Priority
- Low (Default). Queues up with other Low priority items
- Medium. Interrupts Low priority items, and queues up with other Medium priority items
- High. Interrupts Medium and Low priority items, and queues up with other High priority items
Archive Interval
Select the desired Interval relating to the Schedule object assigned on the Connection tab. Archive collections (Alarm, Events, Batch, Periodic, etc) will occur at a frequency based on the configuration of this interval.
Collect Alarms
Default = Not selected. Select to enable collection of alarm data.
Alarm Archive
Click to select or create an Archive Limits. See the Archive Limits section for more details.
Collect Events
Default = Not selected. Select to enable collection of measurement audit data.
Event Archive
Click to select or create an Archive Limits. See the Archive Limits section for more details.
Collect Archive
Default = Not selected. Select to enable collection of the selected archive number.
...
- Raw Data (Default): Use this to transfer archive records from the OMNI. No field identification is attempted.
- Daily data: Identifies known or mapped daily fields if needed for EFM output types
- Batch data: Identifies known or mapped batch fields if needed for EFM output types
- Prove data: Identifies known or mapped prove fields if needed for EFM output types
- Hourly data: Identifies known or mapped hourly fields if needed for EFM output types
...
- No GC (Default)
- Archive 1-25
Archive Object
Click to select or create an Archive Limits. See the Archive Limits section for more details.
Map Type
Select the option to use for interpreting data in archive records.
- ACM Internal Map (Default)
- User Defined Map
- Both Maps
Map
Click to select or create the Modbus History Map Object assigned to this archive. See the Modbus History Map section for more details.
Include Unmapped Fields
Default = Not selected. Select to include unmapped archive fields in the output record.
Concatenate string registers with duplicate identifiers
Default = Not selected. Select to concatenate duplicate string registers into one field.
Text Report Interval
Select the desired Interval relating to the Schedule object assigned on the Connection tab. Text Report collections will occur at a frequency based on the configuration of this interval.
Collect Batch
Default = Not selected. Select to include Batch Report collection on schedule poll.
Batch Archive
Click to select or create an Archive Limits. See the Archive Limits section for more details.
Collect Daily
Default = Not selected. Select to include Daily Report collection on schedule poll.
Daily Archive
Click to select or create an Archive Limits. See the Archive Limits section for more details.
Collect Detailed Daily
Default = Not selected. Select to include Detailed Daily Report collection on schedule poll. (Only available for Gas meters)
Detailed Daily Archive
Click to select or create an Archive Limits. See the Archive Limits section for more details.
Collect Prove
Default = Not selected. Select to include Prove Report collection on schedule poll.
Prove Archive
Click to select or create an Archive Limits. See the Archive Limits section for more details.
Configuration Interval
Select the desired Interval relating to the Schedule object assigned on the Connection tab. Configuration will clear out at a frequency based on the configuration of this interval. This will cause the next data collection requiring this data to collect new configuration from the rtu.
Use Old Archive Method
Default = Not selected. Select to use the older, slower archive retrieval method which requires writing the desired archive record index before retrieving the record.
...
| Info | ||
|---|---|---|
| ||
The OMNI stores totalizer values (counts/pulses). Users can configure an “implied decimal” place of 1, 10, or 100. When ACM retrieves the history records it can store the counts/pluses as is (options to scale disabled), or divide the counts/pulses by the configured decimal place (options to scale enabled). |
Include record index number
Default = Not selected.
Include OMNI revision number
Default = Not selected.
Include RTU clock date and time
Default = Not selected.
Prevent DP and Pulse value conflicts
Default = Not selected. Select to make ACM use the DP or Pulse value appropriately when publishing to outputs like CFX and PGAS. Both values will be in the output record, but the appropriate value for use will be identified based on the type of meter. This is only necessary if the OMNI archive is configured to contain both the DP and Pulse registers.
Skip report timestamp check
Default = Not selected. Some older versions of OMNI firmware don't include the registers that contain the timestamps of reports. This can cause an error during report collection. Check this option to make ACM skip the timestamp check.
Only combine Proves with matching timestamps
Default = Not selected. When prove records are split across multiple archives, ACM will retrieve records at the same index from the configured archives, and combine the records into one prove record. Check this option to only archive records combined when they have matching timestamps.
Meter Runs Tab
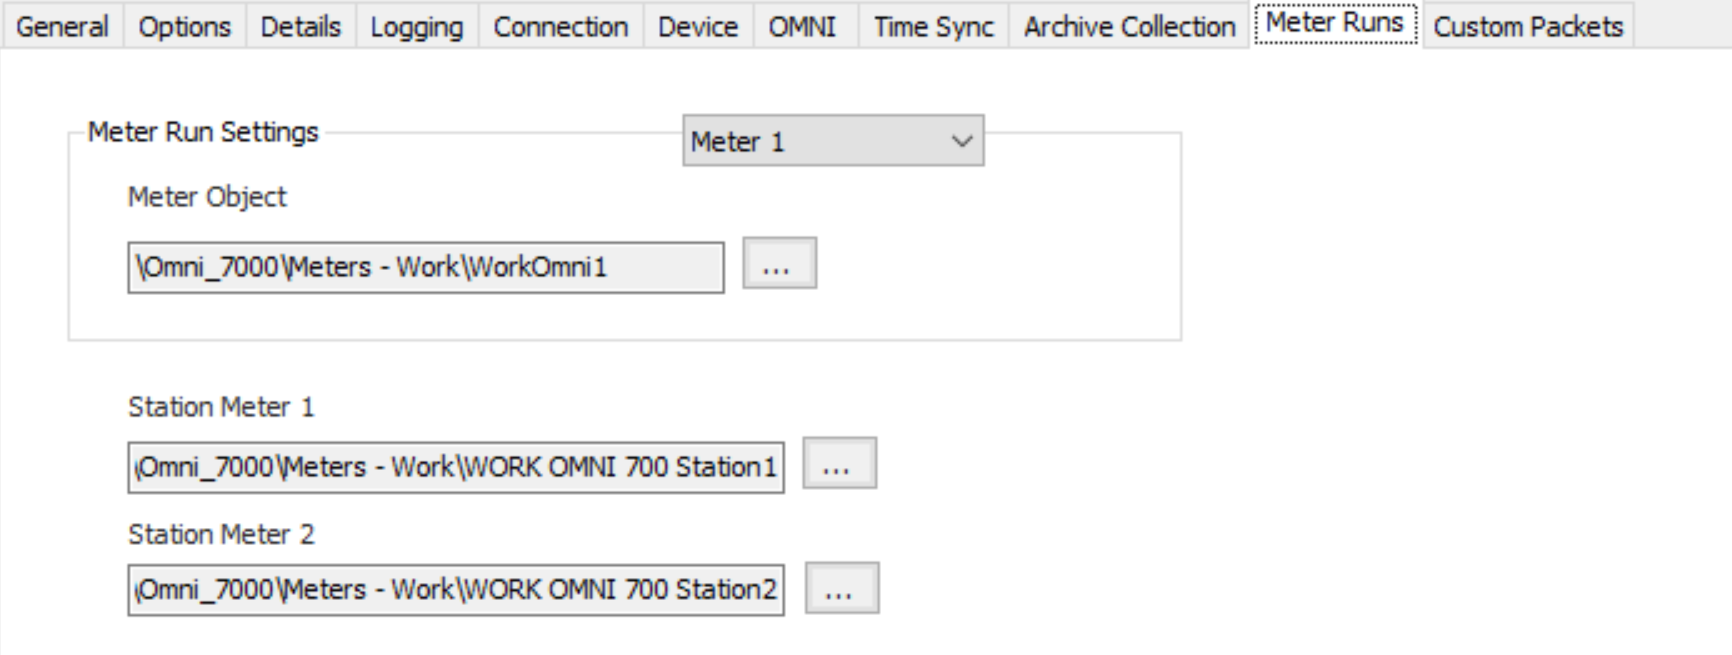
Meter 1-6
Click to select or create the Meter Object assigned for the meter run. See the Meter section for more details.
Station Meter 1 & 2
Click to select or create the Meter Object assigned for the station mater. See the Meter section for more details.
Custom Packets Tab
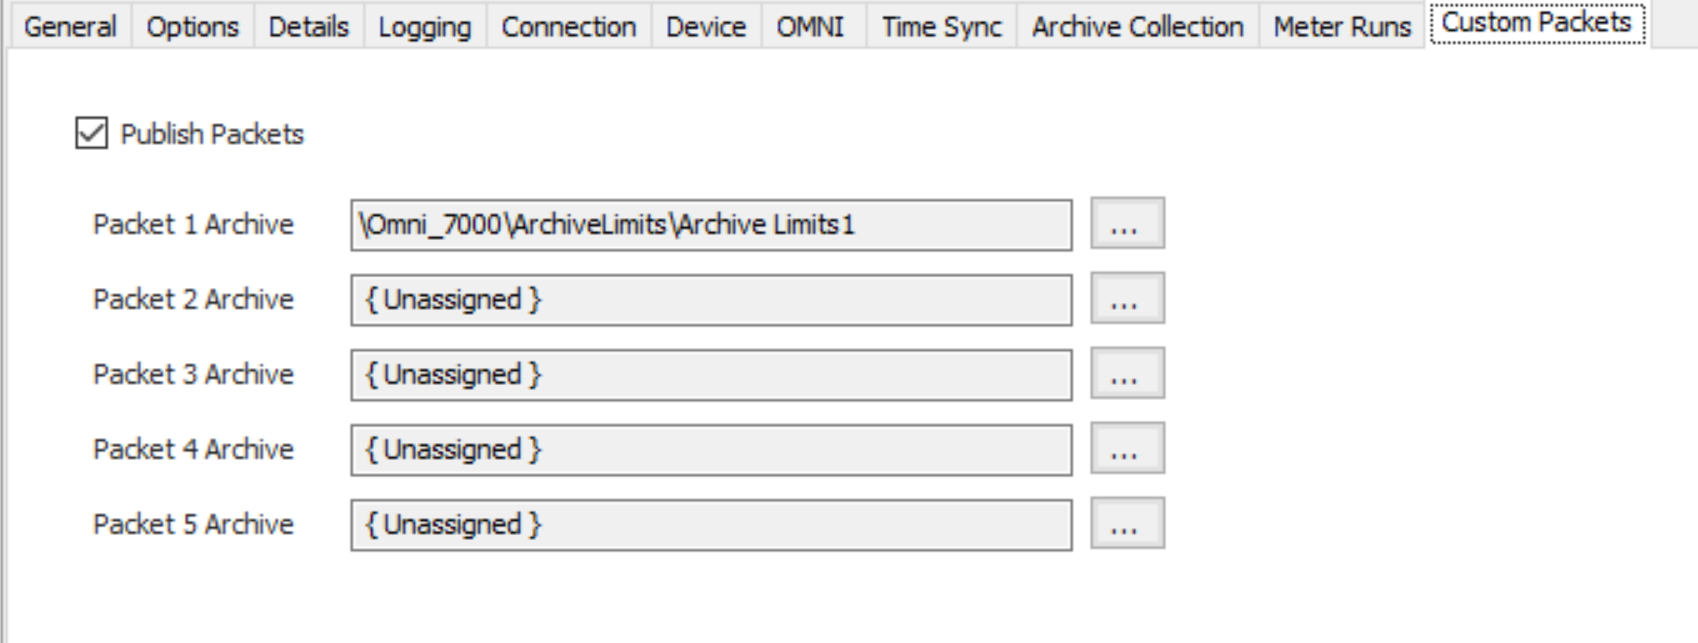
Publish Packets
Default = Not Selected. Select to configure packet archives.
Packet 1-5 Archive
Click to select or create an Archive Limits for each archive. See the Archive Limits section for more details.